Friday, April 10, 2020

Good Friday


Happy Good Friday Friends!

We are definitely living in some historical times! I would have never thought that I’d be teaching my kinder students through an online platform or wearing a face mask to grocery shop. Yet, here we are. It can be scary and lonely at times, but I have hope in my Lord and Savior. I know that He can cause good to come from even the bad times. I know that I can trust in His word when he says not to worry about tomorrow.

To keep things somewhat normal our church is having a drive-in Easter service. All you do is park in the parking lot (every other space) and listen to God’s word. We did the same thing last week for Palm Sunday too. For safety, social distancing is followed by staying in your vehicle and the building is closed. Better to go the bathroom before you get there. LOL

Tomorrow our church is having an Easter Egg hunt….. but this year volunteers hang Easter Eggs on a tree in their front yard. Each family that want s to participate is given a list of house addresses. As they drive around and find the houses, their kids can jump out and grab an egg! Below is a photo of the eggs that I’m working on for my azalea bush out front. I think they turned out pretty good. I used ribbon and pom poms from last years Easter baskets that I made.


Happy Easter Friends!
I hope you enjoy your weekend!
Remember this will be over soon and will definitely be something 
that we can share with our future grandkids.

xoxoxo

Josie


Monday, February 17, 2020

Love One Another


A new command I give you: Love one another. 
As I have loved you, so you must love one another.    
John 13:35


This valentine's day was super fun with fabulous food and my sweet guy! That kind of love is special, but don't forget to love all those near and dear to you. Even those that are strangers or that you don't necessarily agree with. It is important to care for those around us. You never know how you may impact someone or lift someone's spirit. Be the opposite of the majority and shed some much needed light in someone's world. 
xoxo
Josie

Saturday, February 2, 2019

Fall Burlap Wreath


    Gosh! I can't believe that the last time I posted on my blog was 2015! Time has slipped away, and my life has been an utter whirlwind! My family and I have gone through some major changes in our lives and for the last four years we have been trying to catch our breath and make sense of things.... Sadly, during this time I haven't had energy or motivation to do much painting or crafting. I have felt like I have been just going through the motions of life to just survive. Do you ever feel that way? It is a lonely feeling. Fortunately, I'm learning to put one put in front of the other and to move forward in a positive way.
    Last year I did get a little boost of energy to do a burlap wreath! It turned out cute and was super easy to make. I used a grapevine wreath and pipe cleaners for my base. Next, I cut burlap ribbon into squares that I secured with the pipe cleaners onto the wreath. I also bought artificial flowers from Hobby Lobby to add a touch of color! 
    With help from my friends and loved ones and returning to the little things that I enjoy doing in my spare time, I am again feeling that I have meaning and purpose. Hope this wreath inspires you to keep working through your struggles! Just put one foot in front of the other, Friends!. 

xoxoxo
Josie


Saturday, March 28, 2015

Just a Little Chair Make Over

I have been working on reupholstering a chair for the last few months. I can finally say that it is complete!! With the help of my mom, this little chair turned out rather cute.


After selecting fabric, I spray painted the chair silver.


XOXOXO
Happy Painting (and sewing)!
Josie

Sunday, December 21, 2014

Time for a new wreath!

It's that time of year again! Time for a new Christmas wreath. 
My mom and I decided to make a Christmas ornament wreath. It turned out super classy!
We used a straw wreath form, metallic garland, small 
and large shatter proof Christmas ornaments, wired ribbon, and hot glue.


 We used these floral pins to attach the garland and ribbon to the wreath form.


XOXOXO
Josie

Sunday, August 24, 2014

Strawberry Spinach Salad with Poppy Seed Dressing

I love summer time! I love that the sun comes up early and sets late! I love pony tails and flip flops...cut off jeans and tank tops! Summer is a time to renew friendships and kick up your feet! A time to enjoy  back yard gardens and swimming pools! And to top off your summer, fresh produce from the local farmers market is an absolute must! Mmmm...the thought of corn on the cob from the farmer out in Salt Rock!!!! Now I'm really getting hungry!
I want to share my favorite summer salad with you and it is so easy to make! 

STRAWBERRY SPINACH SALAD 
with POPPY SEED DRESSING!!

If you can get locally grown produce to make this salad then do it! Locally grown equals even better. A couple of weeks ago, I bought locally grown strawberries and they were simply divine! They were not those over grown ones like you get in the supermarket. Generally the large ones are tasteless and have a pale or white inner flesh. These were smaller and a deep red all the way through the berry. Simply mouth watering and very sweet!

All you need for this salad:
baby spinach
sliced strawberries
blueberries (optional)
purple onion thinly sliced in rings
feta cheese
almonds or pecans (optional)
grilled chicken (optional)
Sometimes I make this with mandarin oranges.
Put the feta on right before serving!!

Poppy Seed Dressing: 
I got this from a friend years ago!
Put all of these ingredients in a blender
1 cup of sugar
1 1/2 teaspoon salt
1 teaspoon dry mustard
1 1/2 cup oil ( vegetable oil or grape seed oil)
1/2 cup apple cider vinegar
2 teaspoons poppy seeds
5 tablespoons orange juice
1/2 chopped onion (white, yellow, or sweet)

Now that you have your salad and dressing made, don't forget your sweet tea! I like to put fresh mint leaves or a combination of orange and lemon slices in mine
I hope you are having a great summer!
xoxox
Josie


A Little Wreath

This is just a quick post. I seem to have less and less time lately, but I somehow managed to make a cute little wreath! It cost about $7.00 to make. I went to the Dollar Tree and bought a small floral ring that I used as the base for my wreath. Next,
I wrapped it with burlap ribbon. While I was doing that I tea stained 2 packs of coffee filters that I got from the Dollar Tree.Once those were dry ( I gave them a little help with the hair dryer), I hot glued them around my wreath. I started on the top outside edge and stopped once I got about halfway across the front. I stopped there because I wanted the burlap to show on the finished wreath. Take a look..I think it turned out super cute!


XOXOXO
Happy Crafting
&
Happy Back to School
Josie

Monday, June 16, 2014

Jewelry Making

The latest girl's night out (actually...girl's night in) was so much fun! 
We gave jewelry making a whorl and I ended up making 2 pairs of
 fabulous earrings! I couldn't be happier with the way they turned out!
 Of course We had to have food too! Seems 
like everything in my life revolves around eating!
 Salad with homemade basil dressing...
 French 75...
Spinach mushroom crepes with goat cheese. 

Hope you have a creative week!!
xoxox
Josie

Thursday, June 5, 2014

Photo Collage Shadow Box


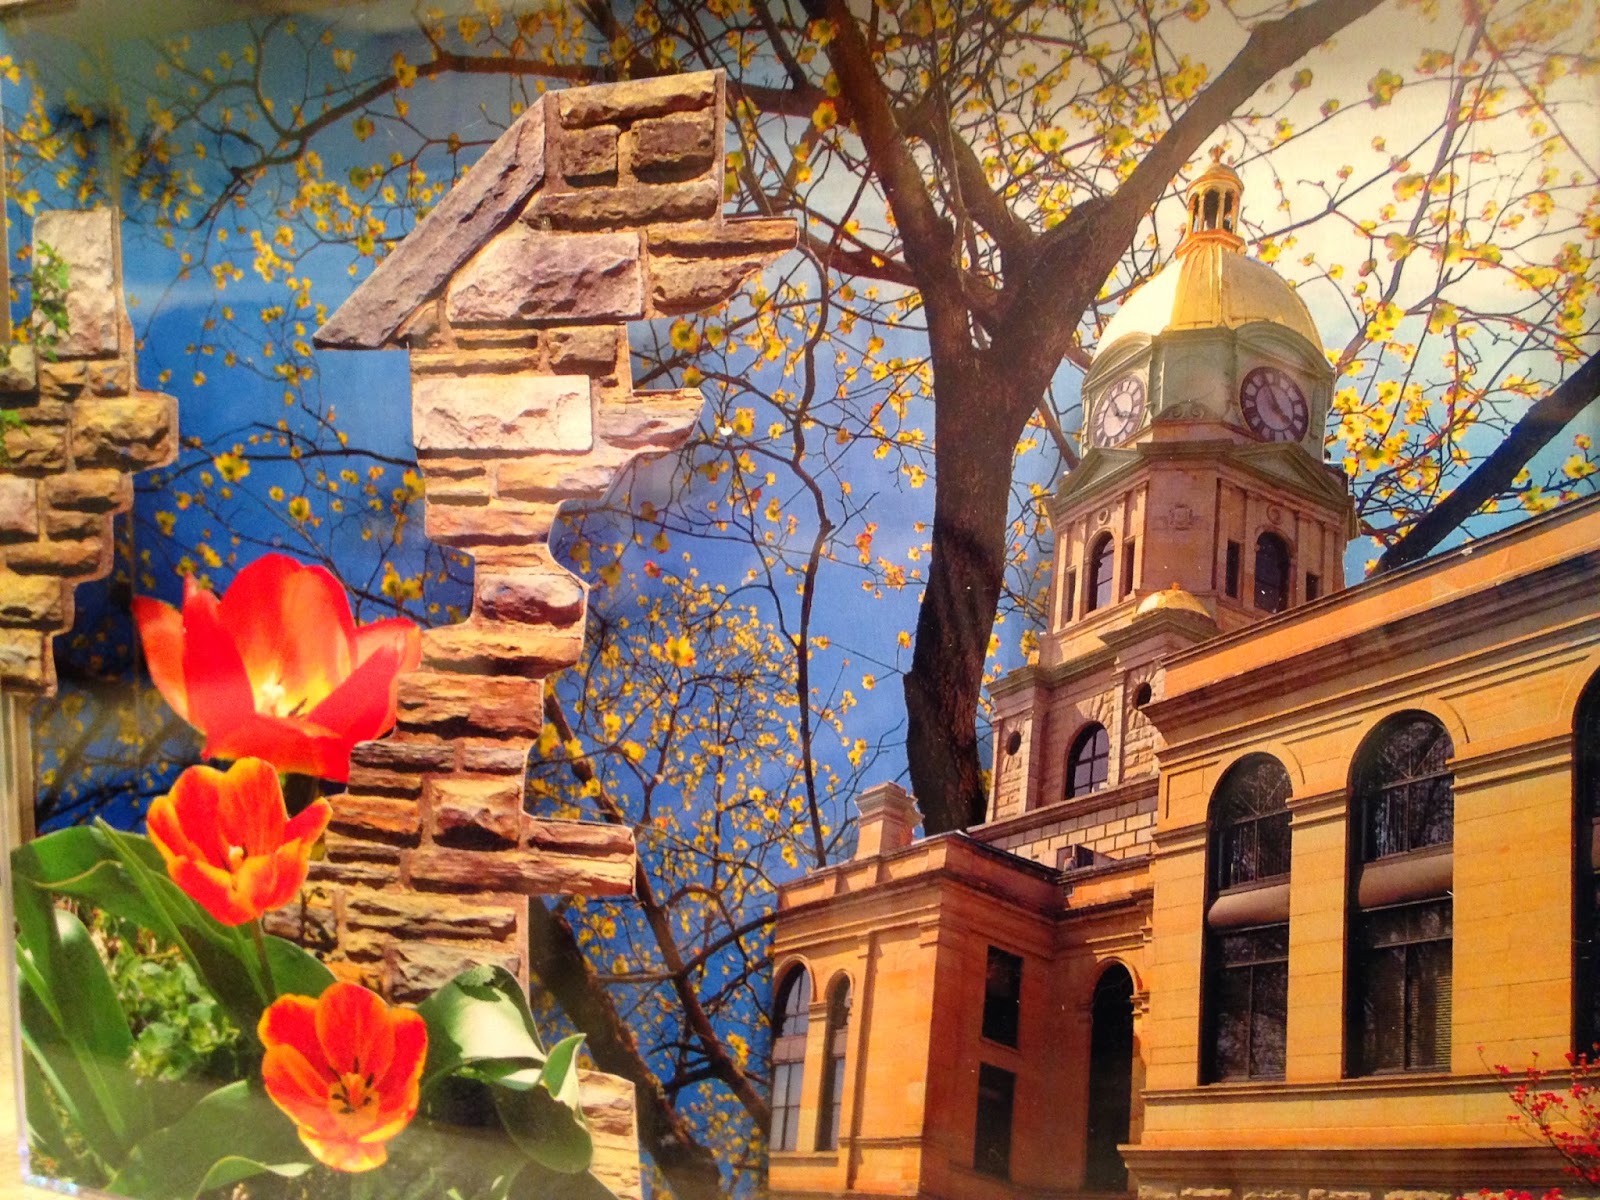
This is a really easy photo collage project that doesn't take much time at all. I first started out by taking a bunch of photos at our local park and downtown area. This photo collage is inside one of those plastic photo collage boxes and it has 3 layers. The first layer is a background image of a tree. I cut it to size and then glued it directly to the bottom (inside back) of the shadow box. The middle section is an image of the courthouse and the largest flower. I used an x acto knife to cut out the building and flower and then glued a couple of styo-foam pieces to the back of them so that they would pop out from my bottom image. Once that was dry, I glued them to my background. For the final layer, I used my x acto knife and cut out flower images and pieces of a stone wall from several other photos . I then sprayed the front of these pieces with spray adhesive and layered them on the inside of the clear lid of the shadow box. Before any of these pieces were attached permanently, I practiced placing them in different arrangements to see what looked best.

 I think this would be a fun project for kids to do with photos from a vacation! 
Have Fun!
xoxoxo
Josie

Saturday, May 31, 2014

Fun Way to Display Your Photos

I am always looking for craft ideas. Something to 
put a new spin on a traditional way of doing something. 
So, I decided to "shabby up" an old picture frame. 
I've seen several versions of these out in stores 
and most recently at a graduation party.
 You could use this idea to display Christmas cards,
 school photos, postcards, or you could even turn it 
into a calendar to count down to an event by adding 
number cards. Let your imagination go wild! 
This is me trying to craft with a cat on my back! hahaha!
 He has a habit of jumping on our shoulders and just hangin' out. Crazy cat!!!
SUPPLIES:
Old frame
twine 
Hot glue/hot glue gun
craft size clothes pins
embellishments ( I used paper flowers)
photos
Hot glue twine from one side of the frame to the other.
 I hot glued these pretty paper flowers to my clothes pins. 
They are actually recycled from the Easter baskets that
 I made my kiddos! So that makes me smile!!
When you finish, all that's left to do is add your photos!
Happy Crafting!!
xoxox
Josie