Showing posts with label Baking. Show all posts

Saturday, December 7, 2013

Oh Dear!!! Sweet 16 and 20 (no longer a teenager)!

It has been several weeks since we celebrated two of my kiddos birthdays. My daughter turned a sweet 16 and my oldest is no longer a teen. Talk about a sad momma!
Good thing birthdays lead to baking which makes me very happy. For both birthday cakes I opted to bake semi-homemade cakes. All in the name of saving time and energy. These days being a wife and mom while juggling a full time job when you have a chronic disease is the pits! Talk about being tired all the time! So semi-homemade is the way to go.
My sweet 16 girl requested a yummy chocolate cake and my now 20 year requested a red velvet cake. I used Ducan Hines Super Moist cake mixes. They baked up very moist!
These are the recipes that I used for the icing on my daughter's chocolate 2-layer cake and the icing that I used on my son's 2-layer red velvet cake.
Butter Cream Icing
Ingredients
1 cup unsalted butter or margarine, room temperature (use vegetable shortening when pure white icing is needed)
1/2 cup milk, room temperature
1/4 teaspoon salt
2 teaspoons vanilla or other desired flavoring
2 pounds confectioners' sugar
Directions
Combine all the ingredients in large mixing bowl and mix at slow speed until smooth. If stiffer icing is needed, or if the weather is very warm, add a little extra sugar. This recipe is enough to cover and fill a 9 by 13-inch sheet cake or 2 (9-inch) layers.


Cream Cheese Butter Cream Icing

1(8oz) package of cream cheese-room temp.
1 stick of unsalted butter-room temp.
1 lbs. of powered sugar
1 tsp. pure vanilla extract
Combine all ingredients in large mixing bowl until smooth.


These cakes turned out so good. I even had a lady tell me that everything looked beautiful. She then asked if I had bought my daughter's cake that morning from the local bakery or the day before because they were closed when she had gone earlier  to get cupcakes. I said, "No, ma'am. I baked this cake myself."

Here's to celebrating birthday's and eating CAKE!

XOXO
Josie


Sunday, June 24, 2012

StoneGable: Pie In a Jar


Doesn't this look YUMMY?!


 Follow the link below to get instructions for a scrumptious 
dessert that is perfect for the 4th of July!


StoneGable: Pie In a Jar


XOXO
Josie

Sunday, December 25, 2011

Chocolate Cake with fresh raspberries


This year for our Christmas Eve get together I made a 
chocolate cake with ganache icing. 
The cake was super moist and yummy in the tummy!  


Recipe:
Sour Cream Chocolate Cake
2 cups all-purpose flour
2 cups sugar
3/4 cup sour cream
1/4 cup shortening
1 cup water 
1 1/4 tsp baking soda
1 tsp salt
1 tsp vanilla 
1/2 tsp baking power
2 eggs
4 squares (1oz each) 
semi-sweet chocolate,
melted and cooled slightly

Heat oven to 350. Grease and flour pan(s).
Beat all ingredients on low speed, scraping bowl constantly, 30 seconds.
Beat on high speed, scraping bowl occasionally, 3 minutes. Pour into pan(s)
Bake until cake tester inserted comes out clean, rectangle 40-45 minutes, rounds 30-35 minutes; cool.
 This cake recipe is from my Betty Crocker cookbook. It was a wedding gift to me and I love it. 
I have used it so much over the years that the pages are stained and torn!

Ganache
follow this link for the ganache icing recipe that I used
http://allrecipes.com/recipe/chocolate-ganache/

Joey and I hanging out at Uncle Jon's Christmas Eve!
My gang is all here!
"The Couples"

Happy Baking!!!!

XOXO
Josie


Friday, December 16, 2011

Southern Living


Southern Living
Caramel Italian Cream Cake
I thought I'd made this cake for Christmas last year, 
but I actually made it for Thanksgiving.
 Notice the Thanksgiving plates...they are a dead give away!


 This cake is so rich!!! It literally melts in your mouth!
 You know the saying "a little dab 'll do ya"....
well this cake fits that saying perfectly! Lol!


I've had several requests to make this cake again. 
If you'd like to give it a try follow the link below.
 I got the recipe from a Southern Living magazine, 
but I was able to find the recipe on-line too. 


Happy Baking!

XOXOXO
Josie


Friday, December 9, 2011

 Tis’ the Season for Recipes


December is now in full swing and I can feel myself getting the urge to start baking.  Last year my mom and I spent a day together baking our little hearts out. Just let me say…it was well worth it. We absolutely love to dig through a cookbook or Southern Living magazine and find beautifully yummy recipes! Paula Deen, Martha Stewart, and all you other bakers out there better get ready to slide on over! My mom and I can whip up a pretty tasty treat! Lol!
All jokes aside, baking is suchhhh FUN!! The funnest part though is eating it!! YUM! YUM! To start the season off I thought I'd share the recipe to one of the things I baked last year! Cake pops...
                  and let me say...
                                        they didn't last long! These little babies are so easy to make! 


Cake Pops
I adapted this recipe from a couple different recipes I found on other sites! 

This is your basic cake pop recipe. No frills. Just plain, simple and scrumdilious.  
  1. Make a 13×9 cake. Any flavor you like, just follow the instructions on the box. I have personally found that chocolate tastes the best. Let it cool. Crumble the cake  and add in 1 can of cream cheese frosting. Put it into the refrigerator for 15 minutes.
  2. After refrigerating form the mixture into ping pong size balls. Then place a sucker stick (I used the extra long ones) with a bit of icing on it into the top of each one. Pop them into the refrigerator for another 15 minutes.
  3. While waiting, start melting your candy melts.
  4. After 15 minutes in the fridge, dip and swirl each pop into your candy melt. Sprinkle with toppings if you like or pipe designs on each one.
  5. Once you’ve got an even coating on the cake pop, place the stick into a Styrofoam block while the candy melt shell hardens. 
  6. Announce to your family and friends that the cake pops are ready. Be prepared to break up fights. (Yes, cake pops are THAT good)
I bought a Christmas pail from A.C. Moore to put my cake pops in.
 I placed a Styrofoam floral block in the the bottom.
Tissue paper is tucked between
each pop to hide it. 

I sprinkled my cake pops with colored sugar, "sprinkles", and crushed candy canes.

Join me in a couple of days for recipe #2

xoxo

Josie


Thursday, November 24, 2011

Mmm...Flavors of Thanksgiving

    All the smells of Thanksgiving food fill my nostrils....turkey roasted to a golden brown, stuffing seasoned with fresh herbs, sweet potato casserole topped with broiled marshmallows, and mashed potatoes whipped to perfection with the beloved Kitchen Aid mixer. 
   As I bustle around the kitchen, memories of Thanksgivings long gone enter my mind. Everything made from scratch...well, as much as possible! LOL! The ham was always made the day before, but the turkey was special. I remember my grandmother getting up extra early to get the turkey in the oven.  I'm talkin' 6-7am because in her mind we had to have Thanksgiving dinner ready at 1pm.  While all this was going on my mom would be getting the casseroles and desserts ready. Yum! Yum! Don't you just love Thanksgiving? All the flavors of comfort food on one special day!
   Somehow over the years the job of making certain "dishes" has been passed on to me.  I don't mind though...I love to cook! This Thanksgiving I'd like to share some of those recipes with you!!


My part of the Thanksgiving Menu
Sweet potato casserole, broccoli casserole, sweet & sour beets, and Cranberry Salad
 Recipes follow.... 


Sweet Potato Casserole
This recipe originated from my great Aunt Effie's daughter, Billy Joyce...Wow! That was a mouthful! She lived in the South, so this recipe holds true to the Southern believe that "the more butter the better"! I tend to agree!
  • 3 cups sweet potatoes...I use about 4 cups.
  • 2 eggs beaten
  • 1 cup sugar
  • 1/2 tsp salt
  • 1 stick of butter
  • 1 can condensed milk
Mix ingredients with a hand mixer. I usually warm this mixture on the stove as I'm mixing it. Just be careful because it will burn easily. Pour into a greased baking dish. Sprinkle with topping (see below).
Topping:
  • 1 cup brown sugar
  • 1/3 cup flour
  • chopped pecans (optional)
  • 1/2 stick of butter
I use a pastry blender when mixing the topping. It should have a crumbly texture.
Bake 45 min. to 1hr or until center is set.
350 degrees
After casserole has baked, I sprinkle mini marshmallows over the top and put it under the broiler until the marshmallows are a golden brown. This takes less than a minute. You MUST watch the casserole the entire time its under the broiler because it can catch on fire!!! TRUST me I know! LOL! 

Broccoli Casserole
This recipe is from the kitchen of my mom, Shelia.

  • 2 boxes chopped broccoli. Cook in microwave 10-20 minutes and drain. I use 2 small bags.
  • Beat 2 eggs until fluffy, stir in 1/2 cup of mayo, 1 can of cream of mushroom soup (undiluted), 3/4 stick of Velveeta cheese, cubed (8oz- I go ahead and use the whole thing.)
  • Add the cooked broccoli to the mixture. Stir and put in a casserole dish.
  • Sprinkle with crumbled Ritz crackers..about 1 sleeve. Dot with butter.
  • Cover with aluminum foil. Bake at 350 degrees for about 45-55 minutes.
  • Remove foil for last 10 minutes of baking time.


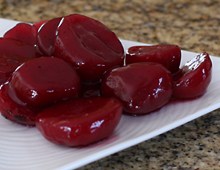
Sweet & Sour Beets
I got this recipe from my mother in-law, Sally. 

    harvard beets easy
  • 1/4 c. sugar
  • 1tsp. cornstarch
  • 2T. water
  • 2T. vinegar
  • 1 T. vegetable oil
  • 1 (16 oz) can sliced beets, drained
  • 1/8 tsp. salt
  • dash pepper
This recipe is super easy! Just mix all ingredients in a pan on 
the stove and bring to a boil. Let cool slightly.


Pretzel Bottom ~ Cranberry Salad 
This recipe is my brother's favorite. I originally came across the recipe years ago from a teacher I met while I was working as a substitute teacher. My grandmother scoured magazines until she found a recipe that was comparable. The original recipe she found called for strawberries.

  • 2c. pretzels, crushed. I use my mini food processor. 
  • 1/2 c. sugar
  • 3/4 c. margarine 

Mix ingredients and press into the bottom of a glass casserole dish. Bake at 400 degrees for 6 minutes. Let cool.
  • 8 oz package of cream cheese (Philadelphia works best)
  • 1c. whip cream (cool whip)
  • 1c. sugar

Use a hand mixer and mix ingredients. Spread over the cooled pretzel layer.
  • 1 large box of red jello. I use cherry, but strawberry/cranberry works just as well.
  • 16 oz can of crushed pineapple, drained
  • 1 can whole cranberries. I use whole cranberry sauce. Be careful to make sure it gets mixed well.
Mix jello as directed on the package. I usually follow the jiggler recipe so that I can cut these in small squares without them falling apart. When almost set spread mixture over the cream cheese layer. Sprinkle with chopped nuts, if desired (I use pecans). Refrigerate until firm. Cut into small squares and arrange on a platter or serve straight from casserole dish. 

Hint: 
  • Make a day ahead
  • you can make individual servings by preparing in a muffin tin lined with cupcake liners.
  • These also look pretty if you pipe some of the cream cheese mixture on each one.

This year I decided to make individual servings in jars!! They turned out pretty cute!


YUMMY!


Wishing 
you the 
Best Thanksgiving Ever!

Many Blessings to you and your family!!!

XOXO
Josie


Wednesday, August 31, 2011

Mmm..Apple Pie!

Fall is just around the corner! 
I can smell it in the air. There has been an undeniable crispness to the air 
every evening this week and it makes me want to bake, bake, bake!
 By the end of summer I'm looking forward to  "fall" food and fun!

I thought these apples looked so beautiful !

My apple peeler/corer/slicer ..it really speeds things up!
 When my kids were little they loved to crank the handle


Ready to be "popped" into the oven!
Apple Pie

10 - inch 2 crust 
Pastry for 10 inch two crust pie
1 cup sugar
1/3 cup all purpose flour
1 tsp ground nutmeg
1 tsp ground cinnamon
dash of salt
8 cups thinly sliced apples (I use 9-10)
3 T margarine or butter

Heat oven to 425
Prepare pastry.
Mix sugar, flour, nutmeg, cinnamon,and salt. Stir in apples. Pour into pastry lined pie plate. Dot with butter. Cover with top pastry that has slits in it; seal and flute edges. Cover edges with foil until the last 15 minutes of baking. Bake until crust is brown and juices start to bubble through the slits, 40-50 minutes.
600 calories per serving! Yikes, but it's worth it!

French Apple Pie         This is the one I typically make. Watch out... It is super sweet.

omit butter and top apple filling with Crumb Topping: Mix 1 cup all purpose flour with 1/2 c butter, and 1/2 c packed brown sugar. Should have a crumbly texture. Sprinkle over apples and cover with foil the last 10 minutes of baking. Bake for 50 minutes. Serve warm with vanilla bean ice cream.


APPLE PIE in a JAR!!


Until next time!
xoxo

Love
Josie


Sunday, May 1, 2011

Lord Dunmore Cupcakes

A couple of weeks ago my daughter wanted to make cupcakes for her friend's birthday.  Her friend owns Old English Sheep dogs just like we do.  So, naturally we thought we'd try to make our cupcakes look like Old English Sheep dogs!

Here is the real Lord Dunmore!
Typical tongue hanging out and caught on the sofa!

Here are the cupcakes we made. 

 Dunmore has 1 blue eye and 1 brown eye so, our cupcakes needed the same...


Presenting Lord Dunmore the cupcake!


Ingredients included: 1 box cake mix, vanilla icing, mini M&M's (for eyes),  junior mints (for the nose), and  licorice tape for the tongue!  I used the edge of a cookie cutter to cut out the tongues.

Pant! Pant!

Anybody want a puppy! LOL!


Have a wonderful week!
God Bless!

Love, 
Josie