Showing posts with label photography. Show all posts

Thursday, June 5, 2014

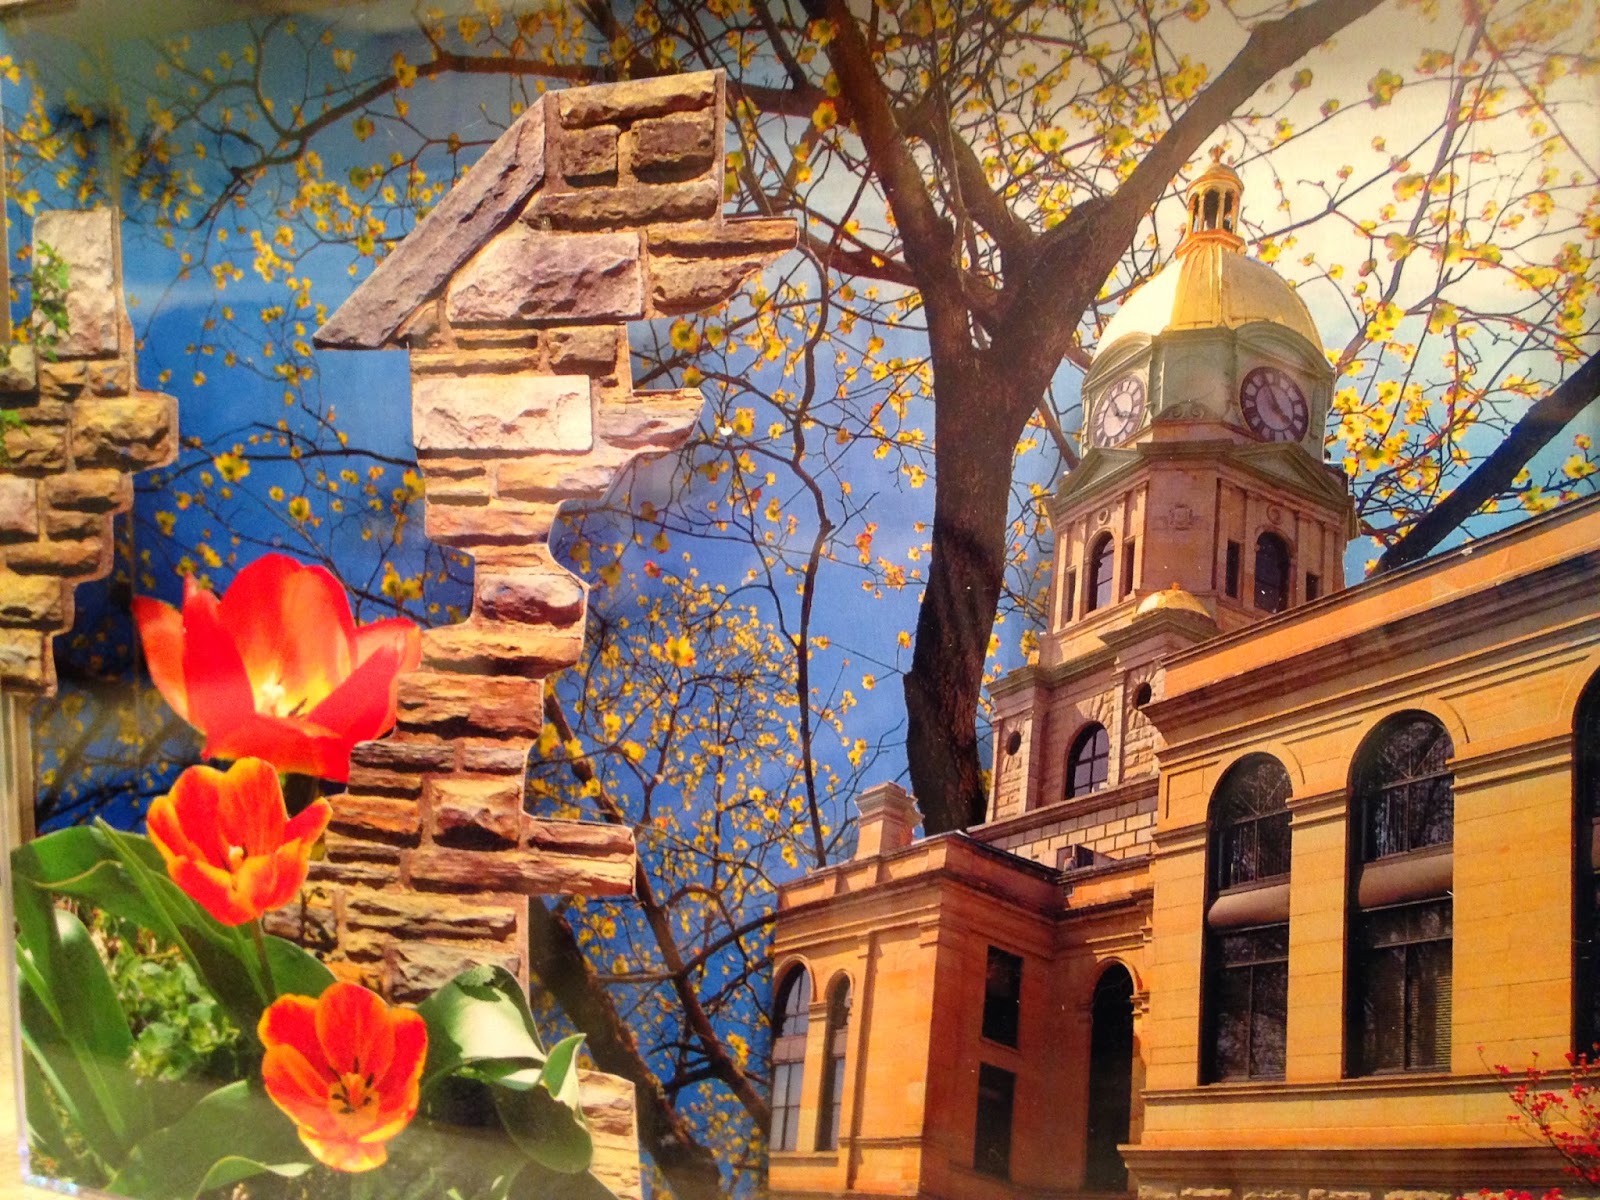
Photo Collage Shadow Box


This is a really easy photo collage project that doesn't take much time at all. I first started out by taking a bunch of photos at our local park and downtown area. This photo collage is inside one of those plastic photo collage boxes and it has 3 layers. The first layer is a background image of a tree. I cut it to size and then glued it directly to the bottom (inside back) of the shadow box. The middle section is an image of the courthouse and the largest flower. I used an x acto knife to cut out the building and flower and then glued a couple of styo-foam pieces to the back of them so that they would pop out from my bottom image. Once that was dry, I glued them to my background. For the final layer, I used my x acto knife and cut out flower images and pieces of a stone wall from several other photos . I then sprayed the front of these pieces with spray adhesive and layered them on the inside of the clear lid of the shadow box. Before any of these pieces were attached permanently, I practiced placing them in different arrangements to see what looked best.

 I think this would be a fun project for kids to do with photos from a vacation! 
Have Fun!
xoxoxo
Josie

Saturday, May 31, 2014

Fun Way to Display Your Photos

I am always looking for craft ideas. Something to 
put a new spin on a traditional way of doing something. 
So, I decided to "shabby up" an old picture frame. 
I've seen several versions of these out in stores 
and most recently at a graduation party.
 You could use this idea to display Christmas cards,
 school photos, postcards, or you could even turn it 
into a calendar to count down to an event by adding 
number cards. Let your imagination go wild! 
This is me trying to craft with a cat on my back! hahaha!
 He has a habit of jumping on our shoulders and just hangin' out. Crazy cat!!!
SUPPLIES:
Old frame
twine 
Hot glue/hot glue gun
craft size clothes pins
embellishments ( I used paper flowers)
photos
Hot glue twine from one side of the frame to the other.
 I hot glued these pretty paper flowers to my clothes pins. 
They are actually recycled from the Easter baskets that
 I made my kiddos! So that makes me smile!!
When you finish, all that's left to do is add your photos!
Happy Crafting!!
xoxox
Josie

Monday, May 26, 2014

Photography Class Artwork/Photo Transfer Project

I absolutely loved this project! I think it was my FAV out of all the things we did in this semester's art class! Once you get the hang of it, photo transferring is so easy! If you have never tried it, I recommend you get the book Spice Up Your Photos by Nitsa Malik. It has more than one great project idea for photo transferring. I think that the one I did is probably the easiest.

SUPPLIES
  • laser copy of a photo that you have taken
  • canvas board
  • spray bottle
  • soft rag or sponge
  • Mod Podge or some other gel medium
  • sponge brush or a medium size flat brush
  • clear finish
  • patience! lol


STEP 1: Take some black and white photos (or color) of some of your favorite things. Print the one that you like best on regular copy paper (not photo paper). Use an image that has a good balance of black and white. Lots of contrast is good.

STEP 2: Use a sponge brush to apply Mod Podge to a canvas board that is the size of your image. Also, apply the Mod Podge to the surface of your image. Let it set until it is slightly tacky. 

STEP 3: Gently lay the image face down on the canvas and smooth all the air bubbles out. It is very important that all air bubbles have been smoothed away or you will have an epic fail. That happened to me the first time I tried this. 

STEP 4: Let it dry.....be patient! This could take as long as 24 hrs. YES! That Long!!!

STEP 5: After it has dried, use a spray bottle to wet the back of your image. 

STEP 6: Use your fingers to start rubbing off the paper. I even used a soft washcloth to help get it off, but don't rub to hard. If you notice the photo below, I was even able to peel the paper off in sections. Just remember to be gentle.

STEP 7: If you want use paint or other materials to jazz up your photo before you seal it. I used gold metallic paint to put accents on mine before I sprayed it with a clear sealant.


Below is my final photo....I love it because it has a vintage vibe to it. 
Plus, it is one of the many photos that I took of my daughter for this year's prom.


LUV LUV ART AND MY GIRL!
xoxox
Josie

Monday, April 21, 2014

Photography Art Class

This school semester I have been taking an art class that incorporates photography. It has proved to be a fun little class. The thing that is even better is that it is hosted through our local board office and led by a couple of our county art teachers. AND since I am a county teacher, I can take the class...PLUS it is free!!!! Yeah!! 
I have loved going to this class! It has been just the thing that I've needed to
 DE - STRESS 
and  have a little me time to enjoy something that I like.
Below you will see one of the projects that I've completed so far. It was a photo transfer project. The photo was printed on glossy photo paper and then transferred onto a surface that had aluminum foil pasted to it. You can transfer an image onto just about any surface though. The next one that I'm going to do is going to be on canvas. Anyway, after you print your picture, cover the image with Mod Podge and adhere it face down to your surface. Once it has been aloud to sit for about 10 minutes, spray the back with water and start rubbing. Eventually the paper will start to come off and the image will be left. 
BEWARE: Mine didn't work that great at first! We were given the glossy photo paper which has a plastic backing....it had to be carefully peeled away and then we still had trouble.
Instead you should use regular copy paper or possibly matte photo paper. I rubbed for literally hours before the paper on my photo finally came off the back. Even worse was that my image didn't really show up. So, I ended up using my imagination and water color to bring the picture back to life. I could only see see a hint of the circles that the ends of the pipes and a few lines they indicted shadows. I think I did pretty good with the water colors. What do you think?


 I will post more art class projects as they are completed!
Happy Creating Fellow Bloggers!
xoxoxo
Josie